My previous water post primarily covered how I’m going to store water. This post is an overview of the entire plumbing system; How water comes in, gets moved around, heated, used and ultimately departs.
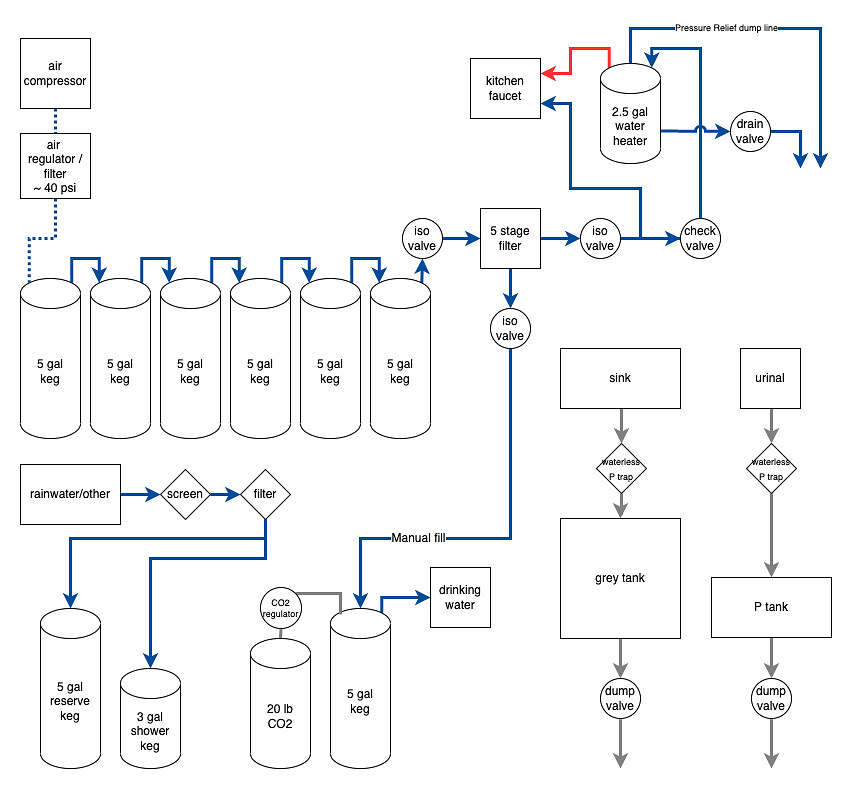
The schematic above illustrates the overall design of my water system, which I’ll further describe in the sections below.
Water Pressure
A typical RV uses a water pump to move water around and there are myriad options available for 12V DC water pumps. However, a water pump only does one thing: pump water. While this may seem obvious, given my space and power limitations, I like to consider alternatives where possible, especially those that can serve multiple purposes. Rather than a traditional water pump I’ve settled on air to pressurize my water supply.
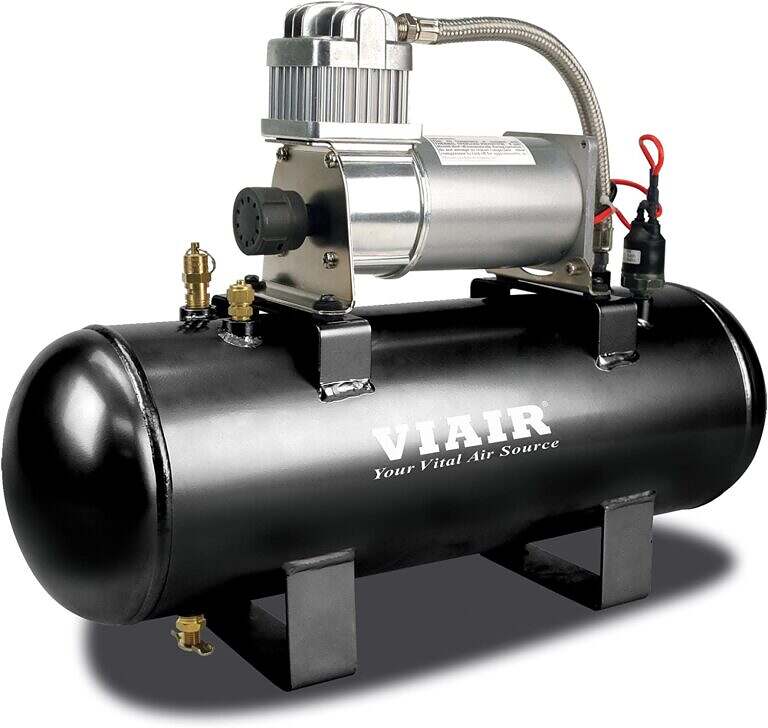
This air pressure will come from a ViAir Air Source Kit, which combines a 12V 150 psi air compressor with an air reservoir and a pressure switch, as well as drain and safety fittings to make it run. While I would have liked to reuse the vacuum pump that came with the ambulance, it was not powerful enough and by the time I added a reservoir and the necessary fittings it would have cost nearly as much as the ViAir, which works out of the box. As I’m new to pneumatics, I decided it would be better to start with a well engineered air source rather than try and build the entire thing from scratch. Like water, air under pressure can get scary dangerous real fast.

In order to reduce the 150 psi created by the air compressor to something around 40 psi (which is typical city water pressure), I’ve added an air regulator, which allows you to dial in a specific pressure. Though the air compressor is oil-less, the air regulator has a built in filter and drain just to be sure no contaminants are introduced into my fresh water tanks. The air compressor, via the regulator, will pressurize six of the stainless 5 gallon kegs that will be daisy chained together in the utility locker and comprise the bulk of my fresh water storage. This water will in turn feed into the filter stage and the hot water heater as needed. The kegs can be disconnected without depressurizing the entire system and each keg has a pressure relief valve so it can then be individually filled before being reconnected to the system. Once reconnected, the rest of the system will re-balance to pressurize that keg.
The air reservoir has a pressure switch on it, designed to automatically turn on the compressor when the pressure drops. However, as I don’t want the compressor kicking on in the middle of the night or running continuously should there be a leak, I have the power to the relay that controls the compressor switched so I can control when it turns on.
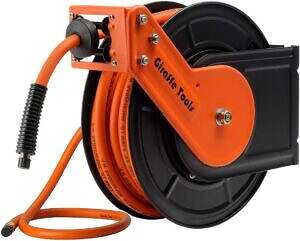
Besides pressurizing the water system I also thought adding a 50′ retractable air hose for filling tires, cleaning solar panels, pressurizing my shower keg, etc would be a fine idea. With 50′ of air hose I’ll be able to reach everywhere in, on and under the truck as well as a vehicle parked in front of or behind me. Truck tires typically require 130 psi, which is another reason I went with a bigger air compressor. In theory, it could also be used in a pinch to fill the truck’s primary air tank should the engine air compressor fail. If that compressor doesn’t air up the reservoir and hold at least 60 psi, the air brake will not release. I briefly experienced this on my trip north from Florida last December. As I reached Ohio and temps dipped below freezing, the engine air compressor required longer and longer to “air up” the tank. On the first morning I encountered temps below 32, the truck took nearly 20 minutes to build adequate air before it would release the parking air brake. Additionally, there were a few miles when I reached Michigan where I was driving and the pressure was dropping perilously close to 45 psi, which is the point the air brake would fail safe and stop the truck. Based on my research this problem can be caused by the governor valve in the air compressor becoming gummed up. It would make sense that the colder it got the more gummy it became. I believe I’ll be able to correct this problem by servicing the engine air compressor, but redundancy is always a good thing. The “house” air compressor will be located in the lower section of Locker E, next to the side entrance. Like the other lockers, this one is already ventilated, which should suffice for the light duty the compressor will be performing to keep my water system pressurized. Any time I was using the compressor for longer periods I would have the locker door open anyway. The compressor I selected has a 30% duty cycle, which means for 18 minutes of run time it needs 42 to cool down. My rough estimates suggest that it will run less than one minute a day in order to maintain 40 psi water pressure. Obviously using it for other tasks will increase that.
Filtration
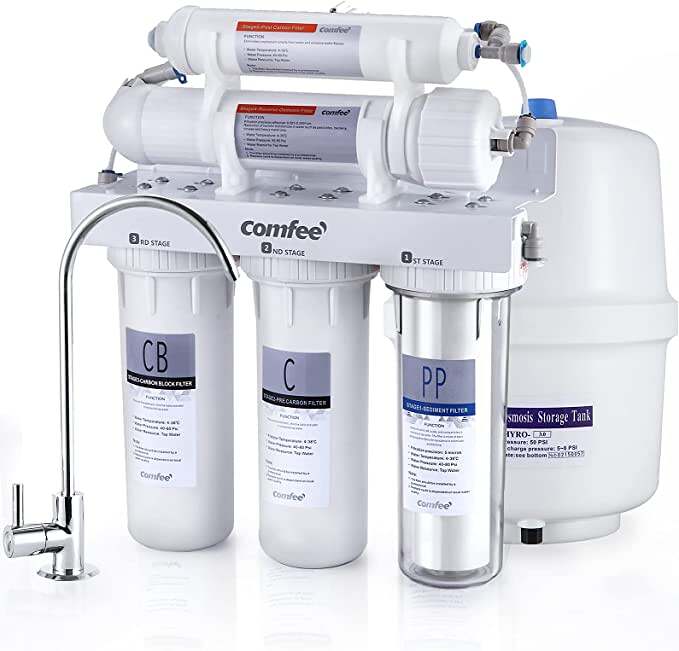
Typically, my water kegs will be filled from potable (drinkable) water sources such as a garden hose, spigot or indoor faucet. Even then, I’m planning to install a multi-stage water filtration system. This will consist of a 4 or 5 stage filter pack in addition to a UV filter. These are sold as all-in-one units with replaceable filters that I can easily fit in my utility cabinet. In the event I need to filter rain water or other natural source, I plan to have a couple of pre-filters to screen for debris and large particles that could clog up the rest of the system.
I’ve also decided I’m going to carry my own water carbonation system. This will be comprised of a 20lb tank of CO2, a CO2 regulator and some bits of tubing and fittings. I already have a food-grade CO2 cylinder, as CO2 is used as a shielding gas for welding steel. This will pressurize my 8th water keg. Left at pressure for 12-24 hours this should saturate the water with CO2. I can then dispense the fizzy water into smaller containers to keep in the refrigerator. As noted on the schematic, the process of filling the “fiz” keg will be a simple manual valve. The filtration pack will also be able to be isolated from the rest of the system for cleaning, troubleshooting or replacement. From there cold water will go directly to the cold water tap on my kitchen sink.
Hot water
I debated for a long time whether I really needed hot water. Since I’ll have a separate heater for my shower keg, the primary hot water heater would only be used at the sink for washing dishes or my hands and face. While I don’t absolutely need hot water for these tasks, it would certainly be nice to have it. The downside is that making hot water is an energy intensive task. In the end I decided on a very small hot water system which, as I detail below, will also function as a solar battery.
Initially I was looking at POU (point of use) water heaters. These come either with small tanks of typically 2-10 gallons or tankless, instant on, heaters. Both types are designed to be installed under a sink and augment a distant hot water heater or run as a stand-alone low-volume source. The instant tankless heaters are very appealing because of their tiny footprint, but as they only are available using AC power, even the smallest of them would use the entirety of my inverter’s 3000 watt output. The small tank options are the next best thing. These hold 2-8 gallons, but again, appear to be only available as AC powered. There are specific models designed to run off your engine or make use of circulating engine coolant to heat the water, but these get wildly expensive and complicated. My engine coolant already runs through the module heat pump and until I can determine if that is something I can make work I don’t want to mess with it further by moving or extending lines.
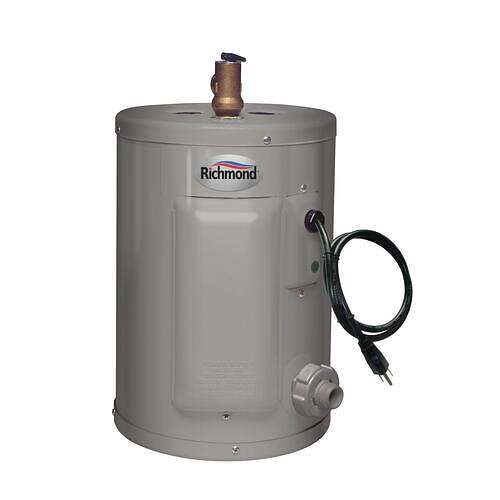
I came across a YouTube video that demonstrated using a modified 2.5 gallon AC water heater as a solar battery. Excess solar power during the day is used to slowly heat the water in the water heater using a 12V silicone heating pad which is wrapped around the inner water tank. This warm-to-hot water can then be used during the day or after the sun has gone down without drawing further power from the batteries. If the batteries are at say 80% and there is more solar power coming in than can be used, then the heating pad would be turned on to heat the water in the water tank. This would also leave the tanks existing 120V heating system in place in the event I wanted quick hot water and had plenty of available power. In the future this system could also be modified to replace the 120V AC heating element with a 12 or 24V element that directly heated the water using DC power and avoiding the parasitic loss of the inverter. Anything that uses DC vs AC is preferred as the inverter is less efficient.
Rain water collection
Early on I saw the potential to use the large amount of roof space on my truck as part of a rain water collection system. I was pleased to discover the truck had a fixed gutter system on all four sides and I have some preliminary designs for connecting the open corners of those gutters to direct the water to a sort of downspout which could then feed a collection system of some sort. With the rear suspension kneeled, the truck also has a natural rearward slant, further making the job of capturing rooftop rain water that much easier. This will be a future project though, as it’s definitely not a priority.
Disposal
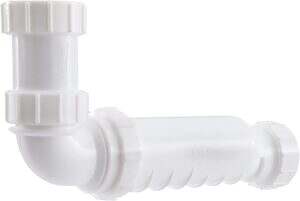
That brings us to eliminating waste water. Since I’m eventually planning to install an incineration toilet I have no need for a black water tank. A grey water tank will capture water from the sink drain and store it until it can be dumped overboard. Since space is at a premium, I found a waterless P trap to replace the more traditional P traps found under household sinks. A P trap is needed to prevent odors from combing back up the pipes into the living area. Essentially, they trap a small amount of water in the pipe which acts as a vapor seal and is replaced with fresher water every time something goes down the sink. The downside to traditional P traps is that they are rather space intensive and the water can eventually evaporate if the sink isn’t used regularly. The waterless P traps can be used vertically or horizontally and have the added benefit of allowing the tank pressure to automatically equalize when draining without the addition of an extra vent in the tank itself.
Pneumatic System
The schematic below is my design for the pneumatic side of my water system which, as I described, will also make pressurized air available for other uses.
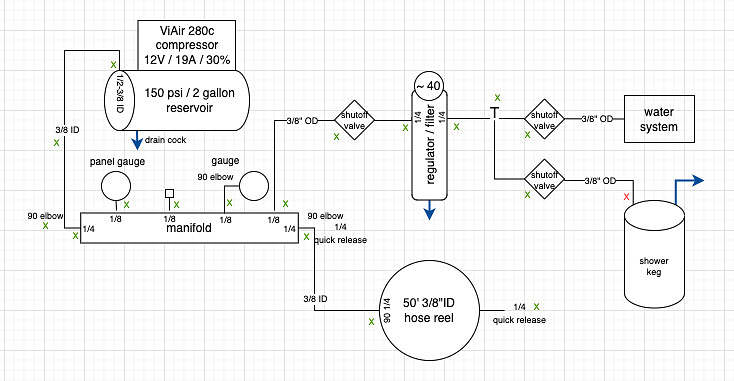
I am making use of the oxygen manifold from the ambulance. By the time I get all the fittings and adapters, I’m not sure it really saves any money over buying a new one specific to my needs, but I like reusing what I can. The manifold has four 1/8″ ports and two 1/4″ ports. These are a bit undersized for the air compressor’s output specs, but the only time I’ll ever be using a lot of air is when filling my 130 psi tires and that will just mean it takes a little longer. The other 1/4″ port will feed the 3/8″ retractable air hose.
I’m not entirely clear why these fittings are called 1/4″ or 1/8″, as they are not actually 1/4″, 1/8″, etc. I made the mistake of eyeballing some of the existing fittings, but was unaware there is also a thread difference when it comes to air fittings vs. liquid pipe fittings. Many of the brass fittings used in the ambulance’s oxygen system were pipe fittings and would not fit. Just to add to the confusion, air hose is typically specified using ID, or inside dimension of the hose, while water hose is identified using OD, or outside dimension of the hose. Conveniently, other than the connection from the compressor to the manifold, the rest of the system will use 3/8″ OD air hose, which happens to also fit the barbs on the quick release keg fittings.
Two of the 1/8″ ports will be used for air pressure gauges. One on the manifold itself in the locker and one running to a gauge on the control panel in the interior. Another 1/8″ port will be sealed off and the final one will feed the regulator and air powered water system.
I’ve designed in shutoff valves to isolate various parts of the system for maintenance or in the event of a leak. My thinking is that if the air for the water side develops a leak, I can still drink water by pouring it out of the tanks. However, I don’t want a leak on the water side to prevent me from filling a low tire which could leave me stranded.