I realized today that it has been months since my last post. I assume no one is reading this dreck, but I still like to try and maintain some kind of consistency. Here’s a few things that don’t really justify their own post.

Inline Vent Fan
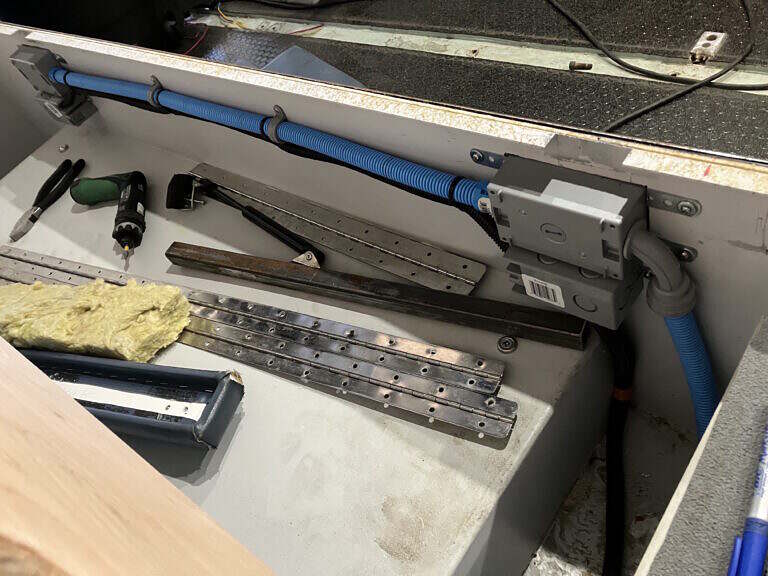
I was spelunking in the far reaches of the back of the module and noticed that what I thought was a mere coupler for a 3″ vent had some wires coming out of it. This turned out to be an inline vent fan commonly used for venting bilges and engine compartments on boats. In this case it was used for active ventilation of the module. As I’ve detailed previously, ambulances in the United States are built to strict standards and one of those defines ventilation of the interior. The standard dictates the volume of fresh air that must be moved through in within a specific period of time. The fan I found is an Attwood Turbo 3000 rated at 120 CFM (Cubic Feet per Minute). It still works and I plan to use it to vent the utility cabinet given all the electronics in there. I had a vague idea to use an 80mm computer fan for this purpose, but those are neither waterproof nor anywhere near as powerful. The Attwood is a bit noisy, but as it will be tucked up behind the cabinets above my kitchen area I don’t think it will be an issue. Ultimately I plan to tie control of it into my management computer so it can automatically kick on the fan if the utility locker exceeds at particular temperature.
Electrical & Insulation
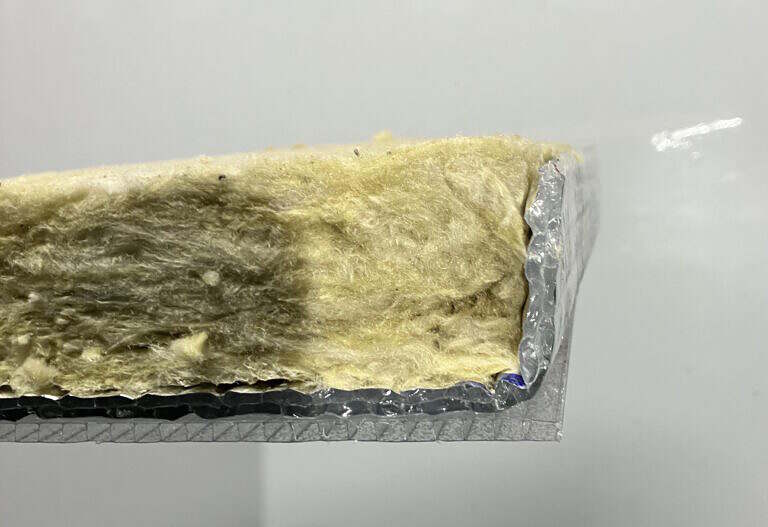
At this point I’ve run most of the electrical DC wiring that I wanted to add. The ceiling wiring is complete and I’ve finished adding the insulation, which was one of the more time consuming tasks. I ended up replacing all the insulation in the ceiling, including above the built-in, full-length cabinet on the driver’s side. In order to install the insulation and prevent it from sagging I came up with a sort of insulation sandwich that I could shove into each slot between the structural members of the ceiling and then seal with aluminum tape. This will preserve the vapor barrier, prevent insulation dust from moving around and give me some much needed, though awkwardly shaped storage space, that would otherwise go unused. When the truck was still an ambulance this area was just closed off with padded panels. The downside is while it’s nearly 18″ deep and runs almost the full length of the module, it’s only about 3.5″ high. Still, that adds up to about 3.5 cubic feet of storage that would otherwise be wasted space. A cross section of the insulation I came up with is shown above. It’s comprised of 1.5″ of mineral wool, a layer of Reflectix and then a corrugated plastic to give it some rigidity and provide an additional air gap. This plastic is actually used in florescent light panels, but it works well for my purposes as well. The rest of the ceiling is insulated in the same manner, save for not having the corrugated plastic bottom layer. For the insulation above the cabinet, I use 3M 90 contact adhesive to hold all the layers together. I also applied Kilmat sound-deadening to as much of the ceiling as I could comfortably reach. Once installed, I tape all the edges using aluminum tape. All together, including all the locker doors, I’ve used nearly 200 yards of aluminum tape.
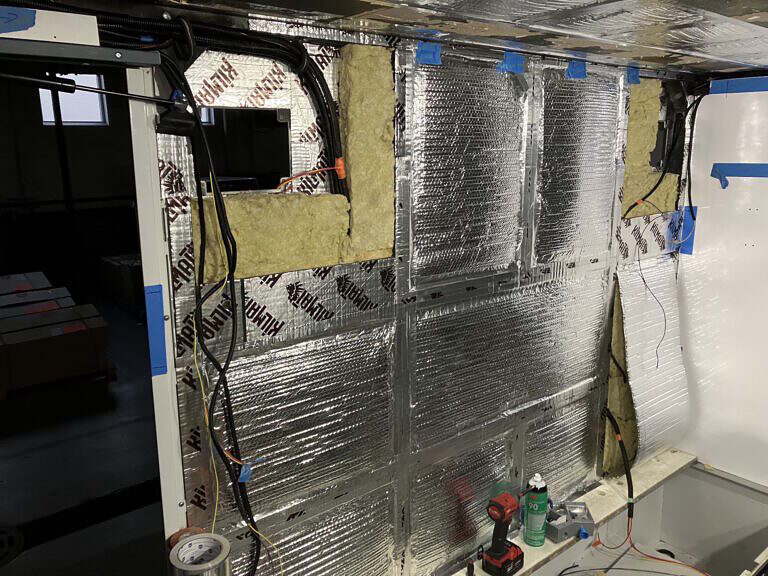
The wiring in the bunk wall is also done, except for the right-side outdoor scene lights which are accessed there. I’m in the process of converting those lights from halogen to LED. There’s also a fair amount of wiring that comes in over the side entrance (top-left of photo) so I’m leaving that open just in case I have any more changes to make.
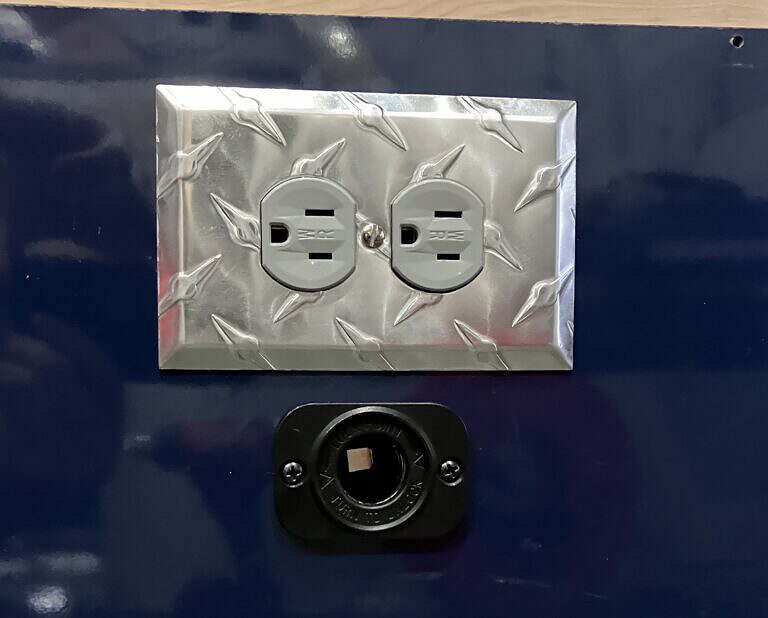
I installed two 120V AC outlets and two 12V outlets on the side of my bunk, which will be essentially under the bed, but still accessible. I went a bit overboard on the 12V outlets around the interior, which will be used for USB charging, but I figure you can never have too many of those and it’s easier to put them in now rather than later when everything is put back together. To install the outlets I made use of the existing holes that were for the handles for the bench seats and enlarged them to mount the 1 gang outlet boxes. As the under bed area will be used for storage, I’ve put all the wiring in conduit and also enclosed the 12V outlets in outlet boxes.