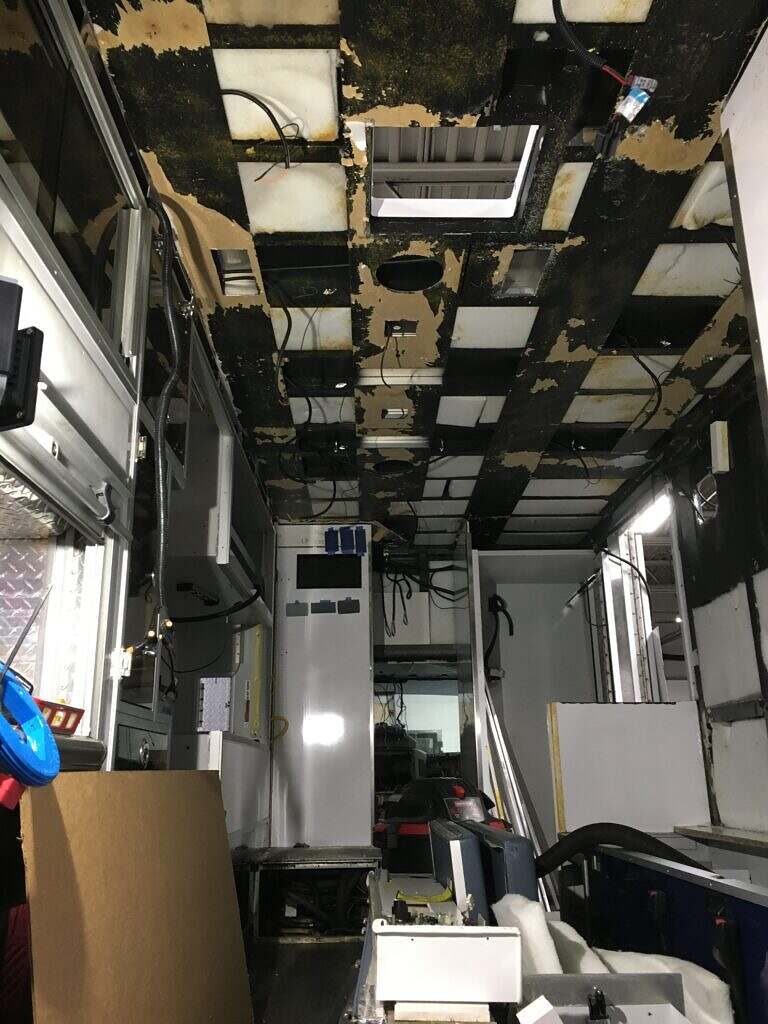
I have spent much of my time in recent weeks devising and implementing a plan for insulating the truck. This included both thermal and noise insulation. The cab in particular, needed quite a bit of both as it was little more than steel bodywork and some flimsy interior ceiling and wall panels along with a big rubber mat covering the floor. Overall, I’ve added over 100 pounds of noise-deadending Kilmat and neoprene rubber in addition to mineral wool and Reflectix insulation to the cab and module.
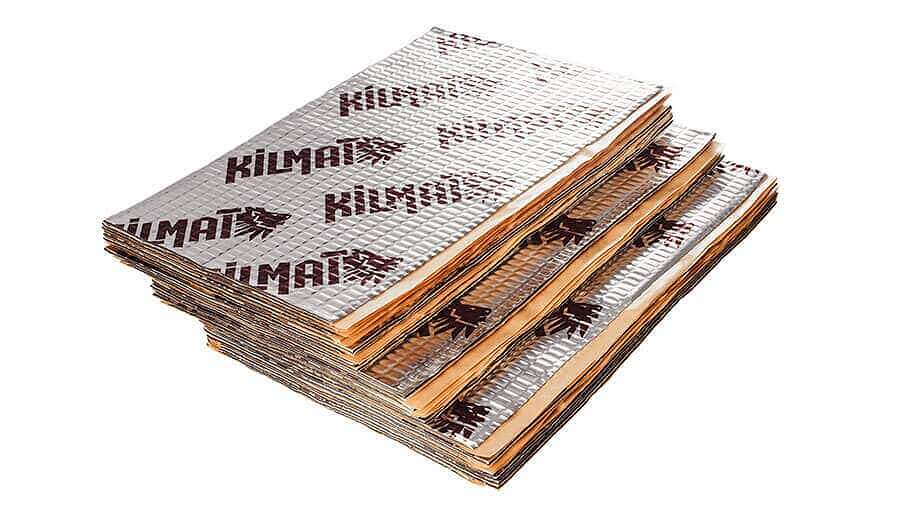
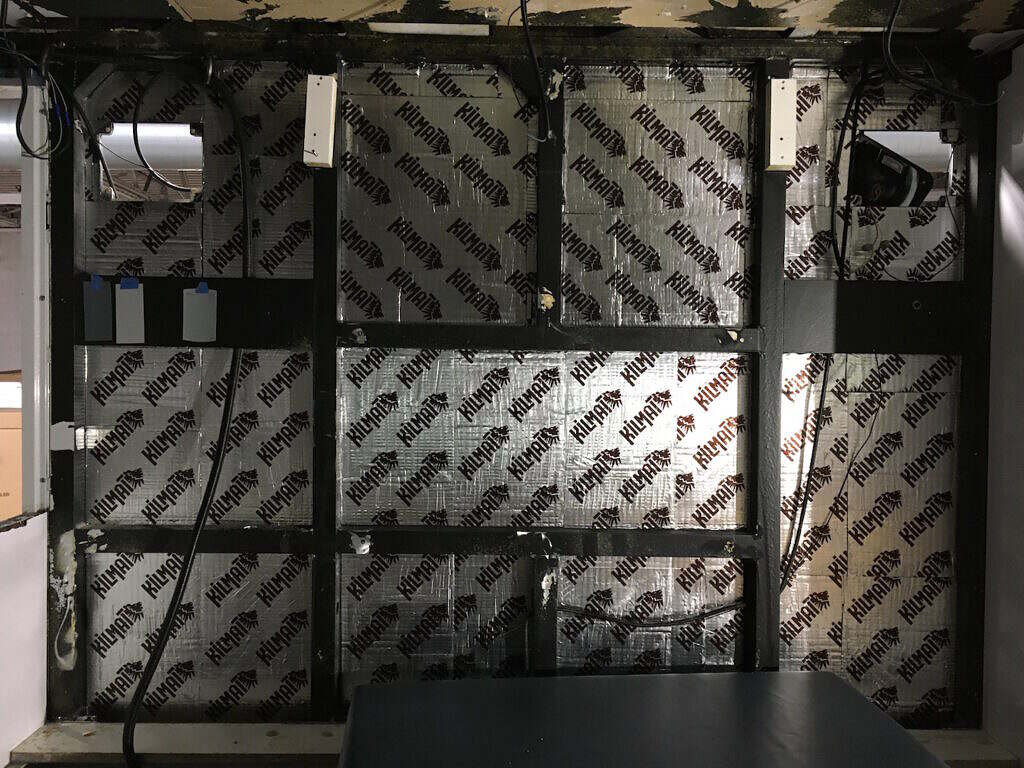
Kilmat is basically a 1/8″ sheet of butyl rubber, which is a sticky, semi-malleable rubber, with an aluminum backing. Once you have it placed, you go over the aluminum backing, which has tiny raised squares on it, with a roller tool. Once all the raised squares are smoothed out you know you have firmly pressed it into the entire surface. It comes in 16″x9″ sheets which can be easily cut to fit most any shape. Because of the shape of the cab roof, with alternating deep and shallow gussets, I used a combination of thin Kilmat and thicker 1/4″ and 1/2″ adhesive-backed neoprene rubber to maximize the insulation while not impeding on the headliner.
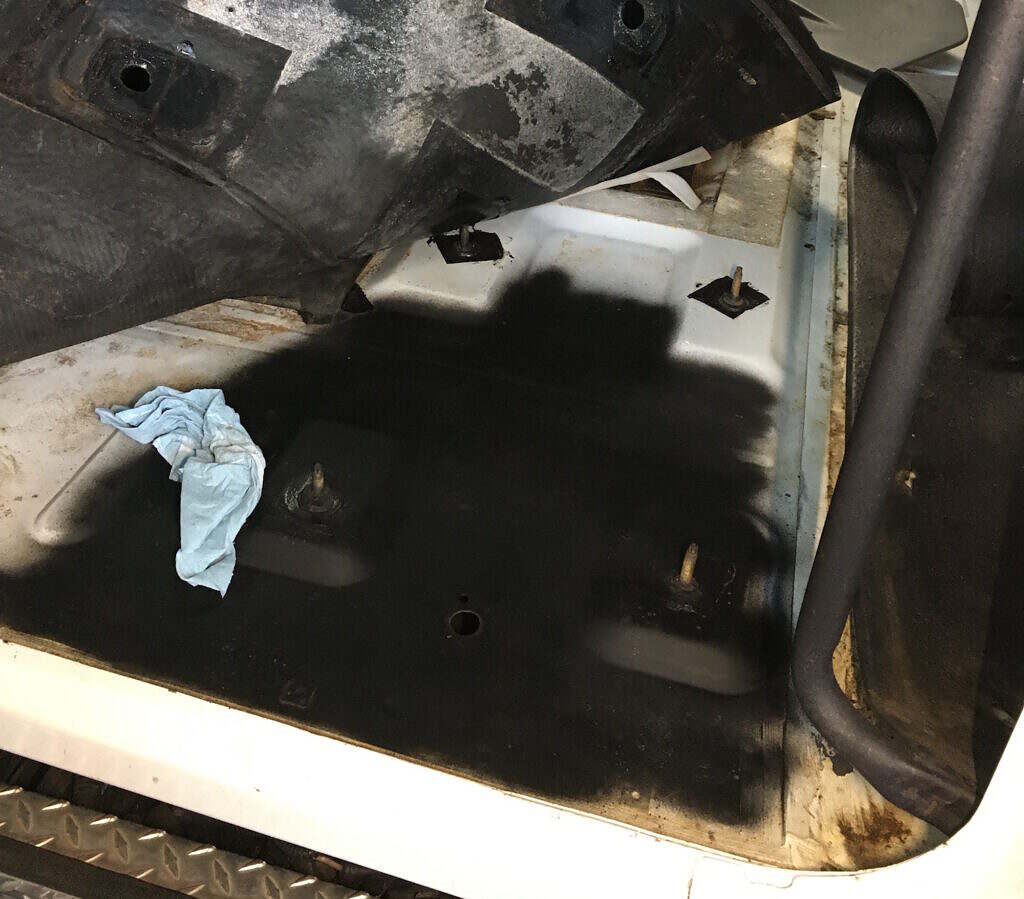
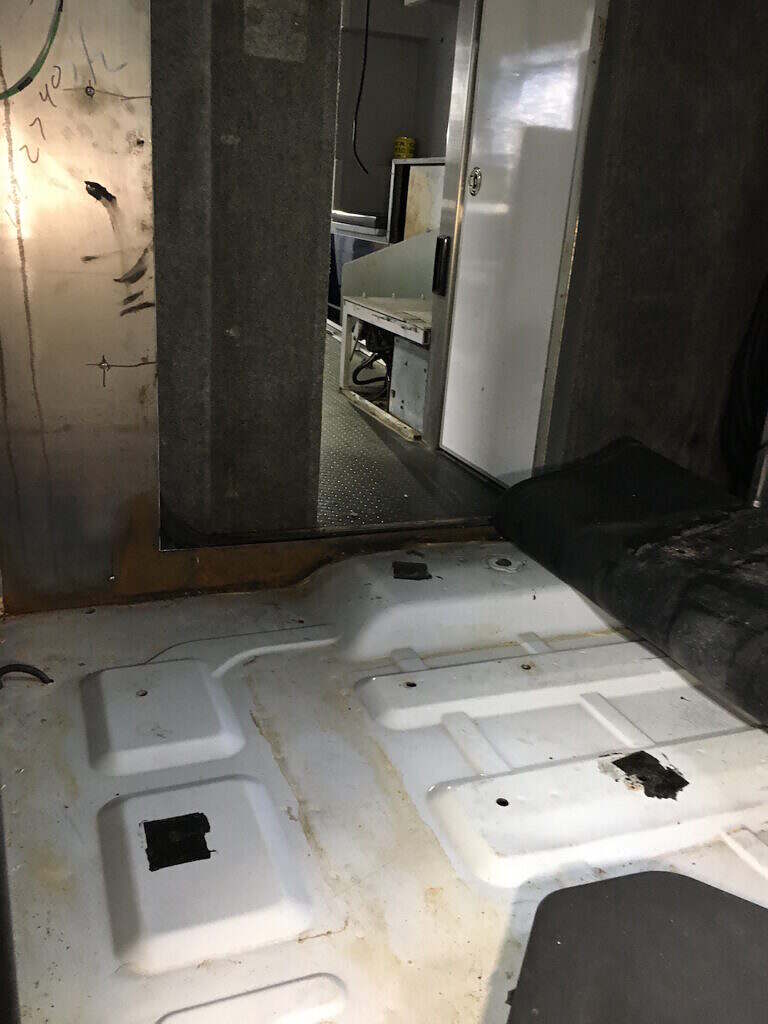
While excavating the cab I did find the only evidence of rust on the entire truck. 99% of it is just superficial surface rust that is easily removed with a wire brush. The only spot I was moderately concerned about was the battery switch next to the drivers seat. This is a positive battery terminal which pierces the cab floor. This had deeper corrosion on the upper and under sides of the cab. The die grinder and a scotch pad made quick work of it and after a proper coating of Rustoleum it should be fine. For the rest of the surface rust areas, including some behind the interior of the cab locker which are basically inaccessible, I’m coating them with a Rustoleum product called Rust Remover. It’s promoted as a spray on paint that chemically converts rust to a paintable surface. It still requires grinding or sanding away as much of the loose rust as possible, but it apparently doesn’t need to be completely rust-free.
Fortunately, the module is made out of aluminum and other than a few stainless steel hinges of questionable quality, there is no evidence of any corrosion anywhere inside or out. I’m going to be applying Kilmat to my bunk wall and ceiling before adding 1.5″ inches of mineral wool. The Kilmat there probably wont do much, as the insides of the module are already coated with a rubber-like paint, but since I have the wall and ceiling open anyway I figure I might as well cover what I can. Once the mineral wool is in, which I lightly secure with 3M 90 heavy duty adhesive spray, I’ll be sealing it all in with a layer of Reflectix and aluminum tape. Reflectix is basically bubble wrap coated with aluminum foil on both sides.

The downside of all the aluminum construction is that it is also very efficient at thermal transfer. I had to take extra care to provide air gaps or other means of thermally separating the outer skin from the inside. Fortunately, the module frame members, which are all 2″ aluminum square tube, were already filled with expanding closed-cell foam and further painted with a rubber-like paint. There are a number of spots that were ground to bare aluminum for grounding points, which I’m covering and a couple of high spots from welds that I needed to grind down. I coated these with Rustoleum Undercoating.
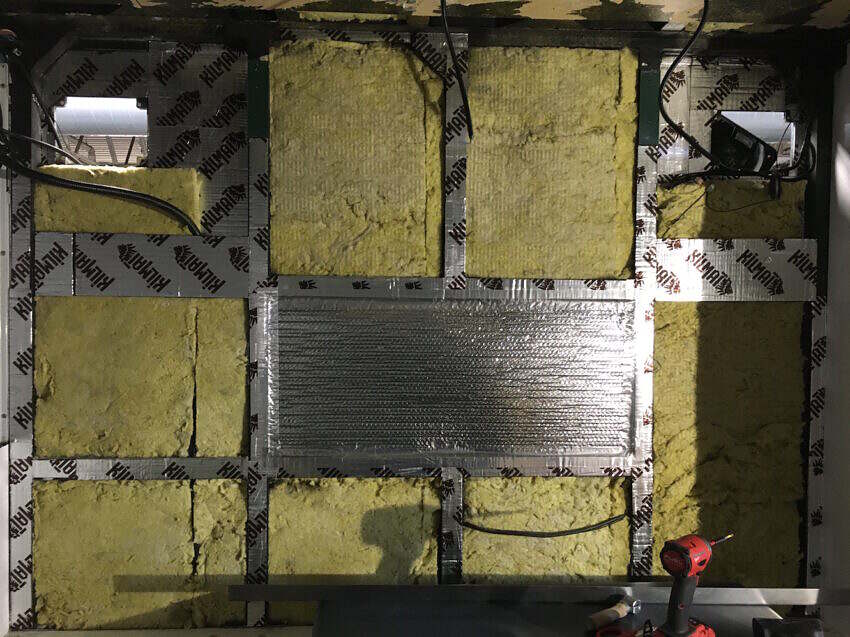
The module body and doors were originally insulated with 2″ polyester insulation. Additionally, all the doors had some kind of an adhesive foam layer with an aluminum backing. However, this was not uniformly applied and there were large gaps of varying sizes on all the doors. The polyester bats in the module body were tightly fit to the structural elements and so I debated whether I should leave it or replace it. On the one hand, it was already fit and could simply be covered with Reflectix to add a vapor barrier and some extra heat rejection, on the other, it didn’t provide the same thermal insulation as mineral wool and only minimal sound deadening. I’m using 3″ bats of Thermafiber mineral wool, which I cut in half to achieve the desired 1.5″ thickness. As a not-at-all-scientific test of the two materials, I placed a square of each on a frozen ice pack and monitored the surface temperature with an IR temperature gun and the subsurface temperature with a thermocouple over a period of an hour. There was little to no difference. I then propped pieces of both on my oven door and heated it to 130 degrees to simulate the wall panels being in direct sunlight and again monitored the temps every 15 minutes for an hour. With heat, the difference was a little greater, but still not huge (roughly 8-10 degrees.) In the end I decided to replace the polyester with mineral wool in the bunk wall and easily accessible parts of the ceiling for it’s superior sound-deadening and fire-resistant properties. I’ll leave the polyester as-is in much of the driver’s side of the module where it’s mostly behind the large built-in cabinet. Two-thirds of the roof is going to be covered with solar panels anyway, which will have several inches of air gap between the bottom of the panel and the roof, which I would expect to slow heat transfer.
Mineral wool is interesting stuff. It’s made from melted rock (hence one of the brand names is Rockwool) and is easier to work with than fiberglass. It’s not as environmentally friendly as real wool, but it does contain 70% recycled content. I looked at using sheep wool as well as recycled denim insulation, but both are considerably more expensive and at present, extremely hard to source. I was able to get the mineral wool at Home Depot. Mineral wool is fire resistant to 2000+ degrees and mold-resistant in addition to being vermin-proof. It isn’t supposed to break down, but it does produce some dust, which I don’t want seeping through the cracks or blowing in every time I slam a door, which is part of the reason I’m sealing everything with Reflectix. The other reason for sealing it is to provide a vapor barrier and prevent condensation from forming and creating a moist environment for mold to grow or corrosion to form. This can be a problem in live-in vehicles, where you spend lots of time with the engine off. Any time it’s colder outside than inside there is a potential for the moisture in your breath to form condensation on the inside of cold exterior surfaces.
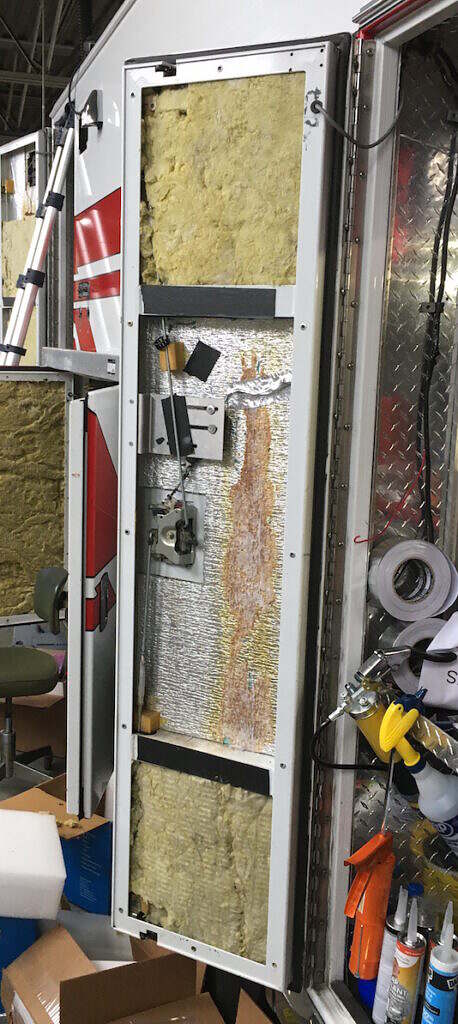
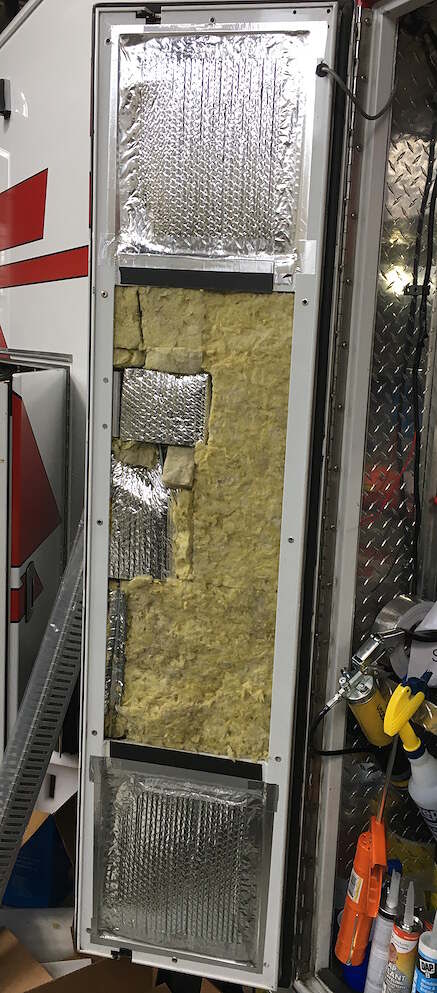
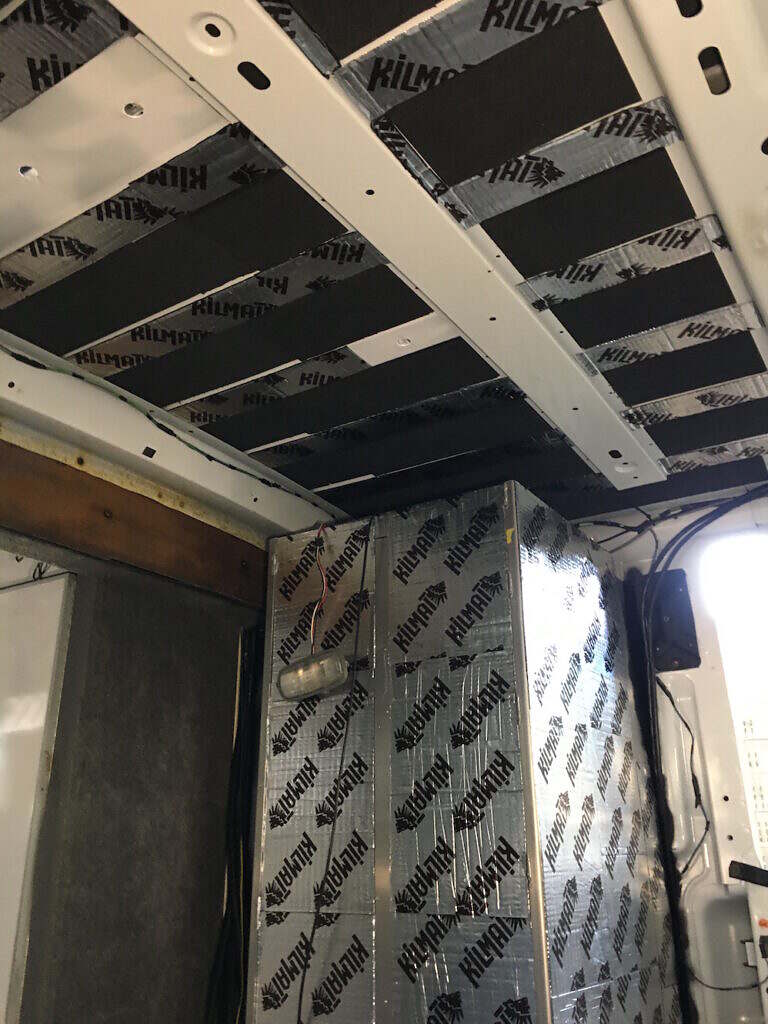
I’ve finished the exterior locker doors and module entrances. I detailed all the door latch mechanisms, cleaning and degreasing them and then applying a heavy duty silicone lubricant. The existing locker door insulation also had fairly large areas missing around all the latches, so I applied 1/4″ neoprene to those areas. I also applied Kilmat to a few select areas, but since the doors already had a foam/reflective layer glued to the inside there wasn’t much more noise deadening to do. To prevent the fibrous mineral wool from gumming up the door latches over time, I wrapped all the mechanisms in Reflectix. Finally, each part of the door separated by the internal aluminum square tube structure is covered with Reflectix and sealed with aluminum tape. They aren’t air-tight, as the latches are not taped over, but it should prevent puffs of any mineral wool from coming inside every time I slam the door. Once the aluminum diamond plate for the lockers and aluminum panels for the doors are screwed back on there should be no evidence they are insulated, other than they now close with an even more satisfying ka-thunk.