One of the (many) advantages when converting an ambulance into an RV is they often come with an inverter, shore power hookup and are pre-wired for 12V DC and 110V AC loads. They may also have an existing house battery system in addition to the truck’s service batteries. The task then becomes how to best re-purpose the existing infrastructure to meet your needs. You’ve done the power audit, planned your solar array and battery storage, now you have to build out the system that will safely and efficiently move that power around so you can store and use it.
Solar capacity is measured in watts (generated) while battery bank capacity is measured in amp-hours (stored). Battery storage capacity is dependent on the battery chemistry, age and ambient temperature. Batteries typically perform worse the colder they get (solar panels are also affected by temperature, but inversely, that is, they generate more power the colder they get.) The three main types of storage batteries are lead-acid, AGM and lithium. Lead-acid are inexpensive but wear out and must be vented to deal with the off-gasing of hydrogen. AGM (Absorbent Glass Mat) are more efficient than lead-acid and don’t off-gas, but can’t be drained more than 50% or it will drastically shorten their life, which means you essentially have to buy twice the actual capacity you need, which also means twice the space and twice the weight. Lithium offer the best performance and can be nearly completely discharged without damage, but they are considerably more expensive and don’t like being charged when it’s below freezing so you may need to consider heating them depending on your target climate. The general consensus is spend the extra money for lithium, because over time period your going to spend almost the same amount on two sets of AGM, which again, will take up twice the space and weight for the same usable power.
In my rig there was never any doubt I was going to go with lithium for the house batteries. The truck itself has three lead-acid 900 CCA (cold cranking amps) service batteries, but the two battery systems will not be directly linked. I do plan to install the ability to charge my house system from the alternator when running the truck engine and in a pinch I could use the house system to jump start the truck. However, this requires either a second alternator or a device to isolate the two systems otherwise you can damage your alternator.
12 Volt System
Nearly all vehicles have a 12 volt electrical system at a minimum. This powers what in my day (cripes, that makes me feel old) were called cigarette lighters, but are now more commonly known as 12V outlets. There are USB adapters to allow you to charge all manner of devices off those 12V outlets or many modern passenger vehicles simply have built in USB chargers. 12V systems are very efficient for short distances, so there are all kinds of accessories from lighting to fans to refrigerators than can run off 12V. Of course, not everything runs off 12V DC. The outlets in your house are going to be 120V AC and many appliances require standard household voltage. In order to convert DC battery current in to AC current you need an inverter. The process of inverting the charge incurs a parasitic loss, so anything running AC is going to be less efficient than things running DC. More voltage is great for running things, but it generates more heat and is more dangerous. Anyone who’s every gotten zapped by a household outlet knows it’s no picnic. 12V or even 24V DC power is much safer. Of course, it’s dependent on the current involved, but generally speaking, anything below 30 volts is considered safe.
I haven’t even talked about wire gauge yet (or terminals or fuses), the size of which depends on how much current you are moving around. The more power that has to moved, the thicker the wire gauge (and terminals and fuses) need to be and the more expensive everything gets (copper is outrageously expensive.)
The Solar Array
Once you have your power audit, which tells you how much power you will need to generate and store, you have to figure out how to get it. The cheapest way of doing that (after the initial installation costs) is via that glorious orb at the center of our Solar System, Sol. Wind turbines are also an option, but these generally aren’t going to be useful except in wide open spaces (ie on the water). Solar panel technology advances at an incredible pace and panels come in a dizzying array of sizes. Fold-able panels, rigid panels, flexible films all have their advantages and drawbacks. Fortunately, I have a huge 14′ x 8′ roof with which to work with. The decision then becomes how to best optimize that space. Solar panels receive the most power when perpendicular to the sun, but it’s obviously much easier to just mount your panels flat to your roof. Ideally, you would want a system that uses a solar radiation detector and continuously adjusts the panels for the optimum solar absorption. This of course is cumbersome to do in practice as it adds complexity and weight to your system, both of which you generally want to minimize in a mobile application, such as perched on the roof your truck. In my estimation, some is better than none, so my goal was to get as much solar on the roof as I could reasonably fit, as simply as possible. I will no doubt seek additional efficiencies and optimizations as I use the system.
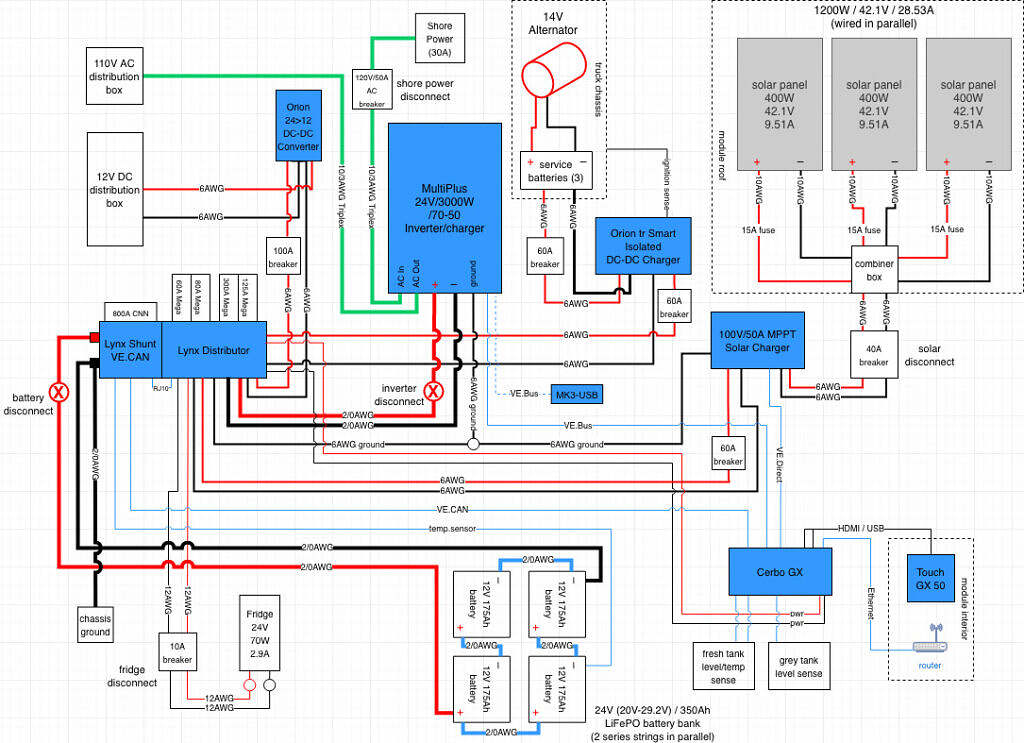
You can, of course, use existing designs or hire someone to design a system for you. However, I wanted to “own” my design and understand it completely. Generally speaking, I can look at a schematic and suss out how it works, but by starting with a blank page, adding each component and linking everything together, I have a far better understanding of it, which in turn gives me a lot more confidence when it comes to actually wiring it all together. It’s important to note that a schematic is only a representation of the components and how they will be connected, it does not illustrate the real-world physical layout of the system. That’s a whole other project worthy of it’s own post.
The Rig’s electrical system:
Electrical System Components
I decided on Victron Energy for most of my electrical system control components. There are plenty of brands out there, some less expensive and some more. Victron has a broad ecosystem of products that all work together and an excellent reputation. They also have a very thorough website with lots of documentation and examples and there are plenty of YouTube videos showing how to install and configure Victron devices. The only major component I didn’t select Victron for were the solar panels and the lithium batteries. I went with VMAX for the batteries and REC Solar for the solar panels, both of which had models which had the best physical fit for my particular installation.
So on to the various components and what they do:
SmartSolar MPPT 100/50 Solar Charge Controller
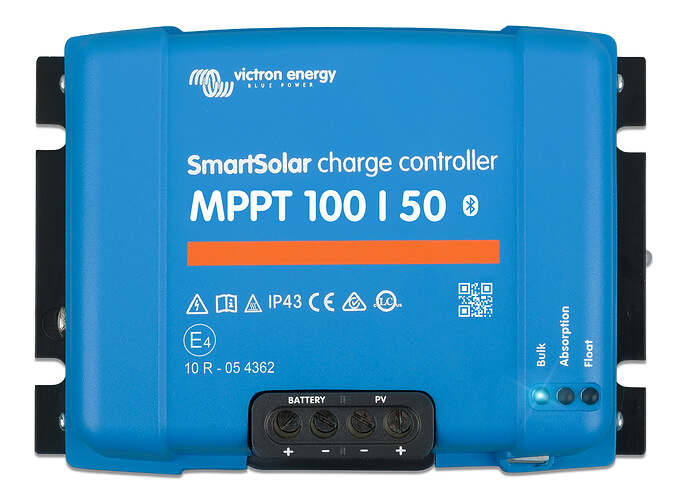
This takes the variable voltage (1- 50V) from my solar panels and converts it into a stable voltage that can be used to charge the batteries. I will be using a Victron Energy MPPT solar charger, which is compatible with 24V battery banks. The numbers 100|50 indicate this charge controller can handle up to 100V and 50A. The swell engineer who helped me refine my electrical design recommended I wire my panels in parallel instead of series. Had I wired them in series, as planned, I would have had to buy the MPPT 250|80 charge controller, which have cost me $500 more.
VMAX LiFoPO 12V 175Ah (4) Storage Batteries
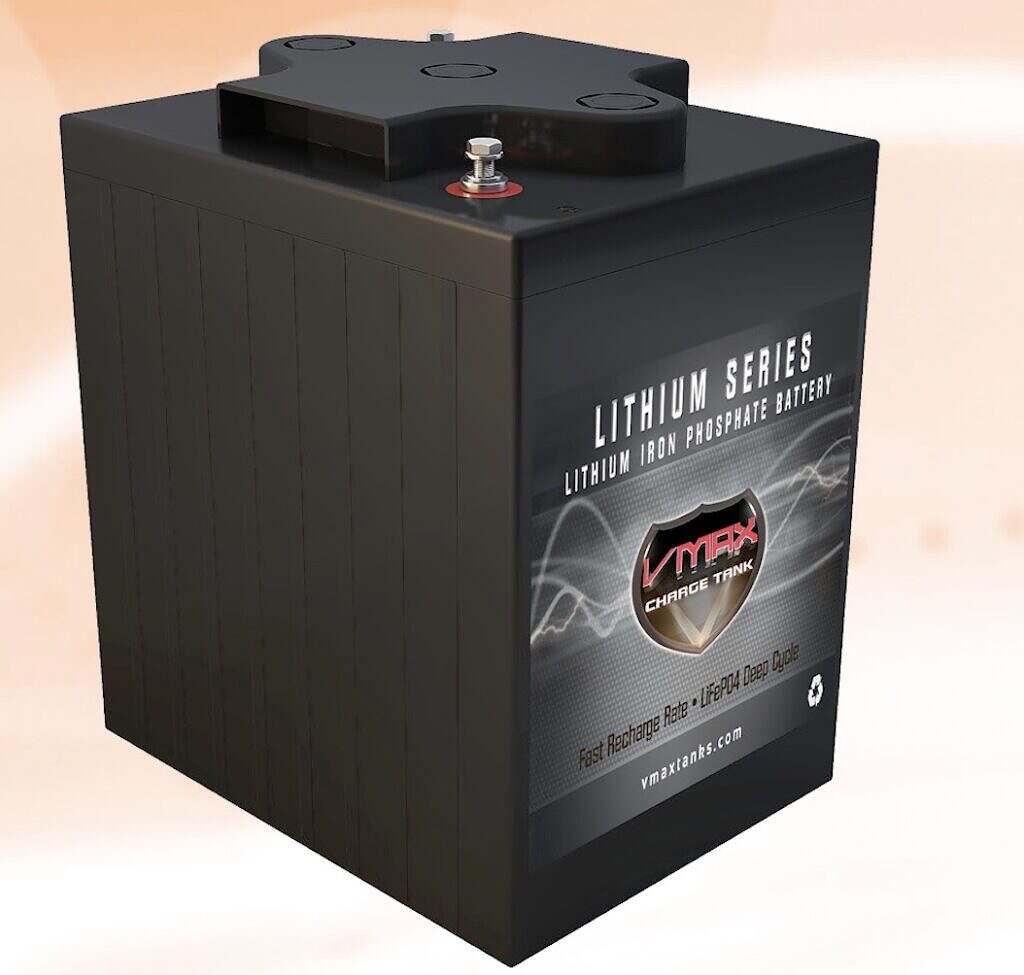
My battery bank will be 24V, which I feel has all the benefits and safety of a 12V system, but because it allows you to halve the amps you are moving around, means all the wires (and terminals and fuses) are less expensive. Like the solar array, how you wire the batteries together determines the overall voltage of the system. I will have two sets of batteries wired in series and then each of those series strings wired in parallel, which will give me the desired 24V system and a total of 350Ah. Yet another “gotcha” with electricity is that what a particular devices is rated at can actually vary in use. Each of my 12V batteries can have an output voltage of between 10V and 14.4V, which means at 24V the overall battery bank could vary between 20V and 29.2V. For reference, a 24V battery bank with 350Ah is equivalent to a 12V bank with 700Ah.
12V System
Orion 24|12-70 DC-DC Converter
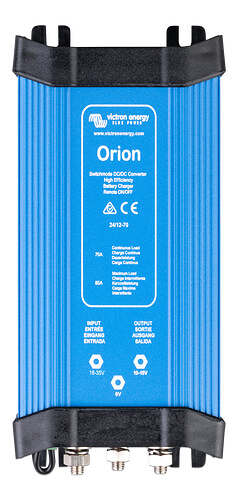
This device takes 24V from the battery bank and supplies 12V, which will be used by the majority of the end load devices in my truck (lights, fans, USB chargers) via a 12V distribution block.
Alternator charging
Orion tr Smart Isolated 360W 12/24-15 DC-DC Charger
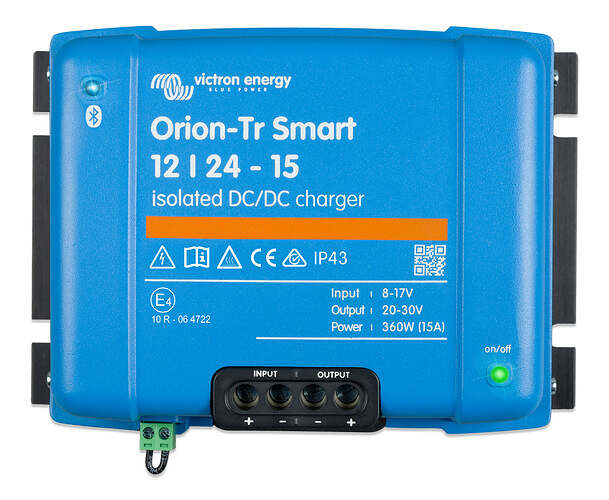
I also wanted the ability to use the truck’s alternator to charge the house batteries when the truck is running. The alternator is running anyway, so why not make use of that power when driving somewhere? In a pinch I can also just run the engine at idle and use it basically as a generator. This might be useful if I’m in the middle of nowhere and experience more than few sunless days in a row. One thing you have to be careful of is power back-feeding into the truck battery system from the house system and damaging the alternator. This is where the “Smart” and “Isolated” come into play. The Orion charger can detect when the engine is running or can be wired directly to the ignition so it’s totally shutoff unless the truck is running and it isolates the house batteries from the truck.
Central Monitoring and Control
Cerbo GX and Touch GX 50
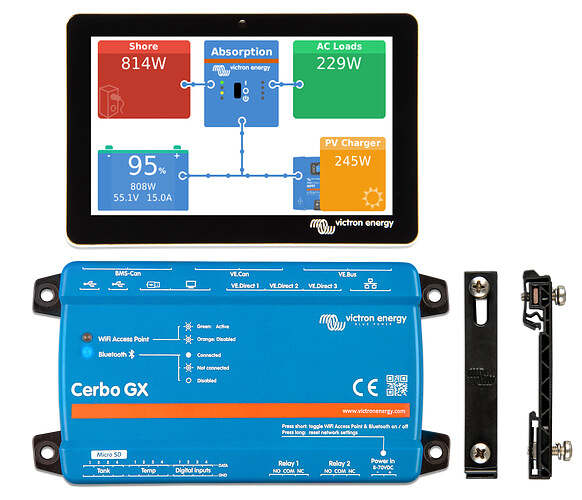
Most of the Victron components have their own “brain” and can be used on their own, but many also have the ability to work together. The Cerbo GX basically lets you connect the solar charger, inverter/charger, DC charger and the Lynx battery Shunt so it can all be monitored from one point, either the Victron App, the Victron Remote Portal on a computer, or the Touch GX 50 screen, which will be mounted in the module. The Cerbo also has extra inputs so I’ll be able to monitor my fresh and greywater tank levels and temps. I also plan to have my utility cabinet actively vented. The Cerbo will be able to monitor the temperature in the cabinet and turn on a fan when a specified threshold is met.
Shore Power
Shore power means hooking up to an external power source such as a campground pedestal or a household outlet via a cable. My truck has two existing shore power hookups, one to power the truck and a dedicated plug to power the rooftop A/C unit (which I’ve removed.) These are special auto-ejecting outlets, made for emergency vehicles. When the ignition is turned on, a solenoid in the outlet is activated which pops the connector out. This is because emergency vehicles are kept plugged in when garaged, so they are always charged and ready to go. At the same time, they don’t want the crew driving off while still connected to the shore power cables and damaging the truck or the fire station.
Inverter
MultiPlus 24V/3000W/70 Inverter/Charger
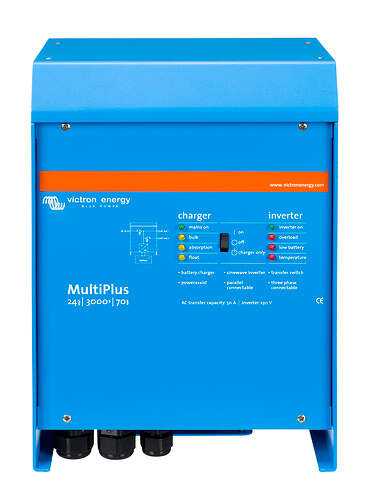
The MultiPlus takes power input from the shore power connection and uses it to supply AC power directly or converts it into DC for charging the battery. It can also take DC battery power and convert it to AC or do fancy things like augment the incoming AC supply with power from the batteries depending on the load.
Power Distribution
Lynx Distributor and Lynx Shunt VE.CAN
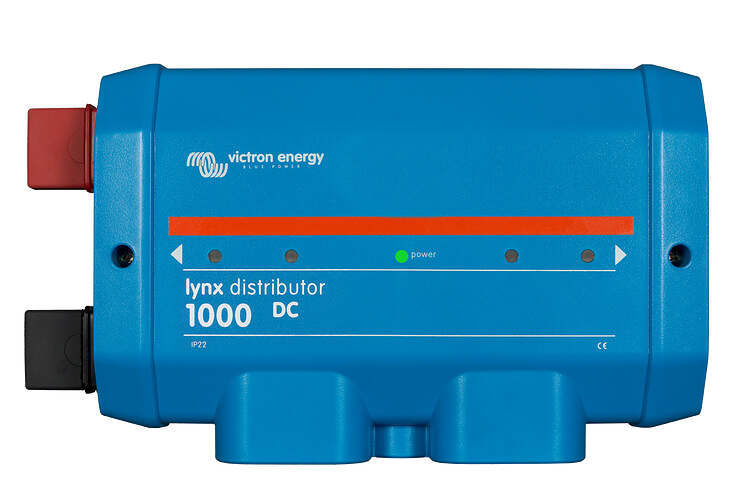
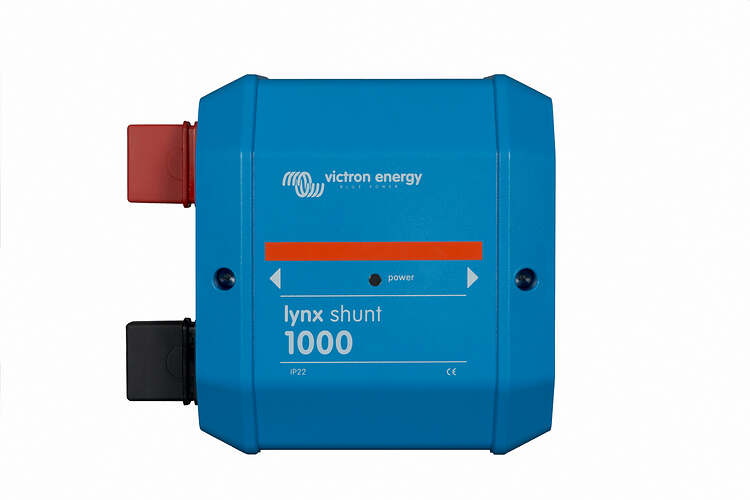
In this type of build you need a busbar, which is basically a bar of copper with bolts on it, to hook all the components together so power can move around (you need two busbars, a positive and negative.) The Victron Lynx system makes this a very simple and clean install, adding fused connections, which it then monitors for you. In order to sense power going into or out of the battery, you also need what is called shunt, which is placed between the negative terminal of your battery system and the distribution busbar. The Lynx Shunt is designed to integrate with the Lynx Distributor and also talks to the Cerbo via the CAN (Controller Area Network).
Fuses, Breakers & Disconnects
If something goes wrong, you want to stop it before it damages other components or starts a fire. For this you use fuses and breakers of various capacities sized to the load they are to protect. Breakers are re-settable after being tripped whereas fuses must be replaced once blown. In a few spots I’m using breakers as essentially on/off switches to isolate parts of the system so it can be worked on safely. The solar panels are a good example of this. Solar panels do not have on/off switches. If there is light hitting them, they are going to generate some power. My panels, for example, are capable of generating up to 51 volts, which I certainly don’t want to shake hands with. I will also have the ability to disconnect the battery bank from the rest of the system as well as the MultiPlus Inverter.
Wire, Lugs, Ferrules, Heatshrink and Terminals
Wire gauge is selected based on the load it will carry. The thinner the wire, the higher the resistance, the smaller the load the wire can carry. Wire in the US follows the AWG (American Wire Gauge) standard and somewhat confusingly, the small the number, the larger the wire gauge. 16 AWG wire is far thinner than 2/0 (two-aught), which is also known as battery or welding cable. In a mobile application, you also want to be sure to use stranded copper wire, which stands up to flexing and vibration better than solid core wire you would typically use in a building. Copper wire and fittings are often tinned to aid in corrosion protection, which gives them a silver appearance rather than the traditional copper-red. Note: Avoid CCA (Copper Coated Aluminum), which is often much cheaper, but also not as efficient of a conductor as copper. If you’re going to do it, do it right and the electrical system is not where you want to skimp.
Tools
Wire Cutters, Strippers, & Crimpers
Once you have your various gauges of wire, you have to cut it, strip off the insulation and crimp ferrules or lugs onto the ends. Ferrules are basically like those little things at the end of your shoelaces that keep them from fraying, except ferrules are metal. They make for a cleaner connection and avoid having any stray strands of wire that could potentially cause a short. Of course, because you have many different wire gauges, you need a variety of sizes of each of these to fit them. This in turn means you need tools sized to work with this variety. The most expensive of these is the hydraulic crimper, which is used to crimp lugs onto the bigger gauges of wire. There are cheap options for doing this (and much more expensive), but in my view, it basically comes down to having the right tool for the job. I’m going to have around 50 large crimps to do on the 2/0 and 6AWG wire in my build, so the $50 cost of the tool was not too hard to justify. In all we’re talking less than $100 in tools to work on $700 of wire and connectors all connecting many thousands in electrical components. I also figured I can sell it and recover some of the cost once the system is done. Strippers remove the insulating jacket from the wire in order to expose the conductor so it can have good connection to the lug or ferrule.
Whew! Still with me? That is a lot of stuff. Now it gets fun: wiring all those components together, along with the data cables and all the positive and negative cables for the DC side and triplex wiring for the AC.